The aim of this project was to create a CGI environment rendered separately from the character and then composited together in layers. From the very beginning, I saw this project as an opportunity to push myself beyond my comfort zone and explore character animation, which I had never attempted before starting the MA. Approaching this unfamiliar area was both challenging and exciting, and it shaped the way I developed the project. I wanted to create a short animated piece with a light, humorous tone—something playful and enjoyable to watch—while also allowing myself space to experiment and learn through the process. This resulted in a simple narrative about a bird and its encounter with a caterpillar, a story that gradually unfolds into an unexpectedly drastic (at least for one side) ending.
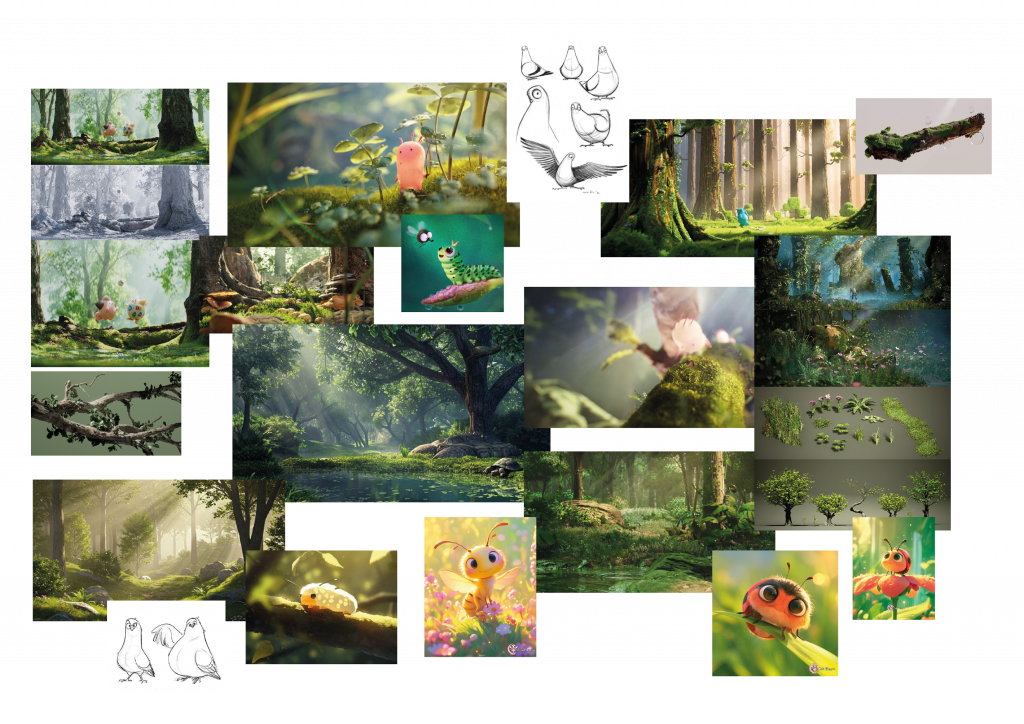
- STORYBOARD AND MOODBOARD
To have a clear idea of what I want to create, I started the process by designing a storyboard and gathering references and inspirations.

2. MODELLING AND TEXTURING THE CHARACTERS
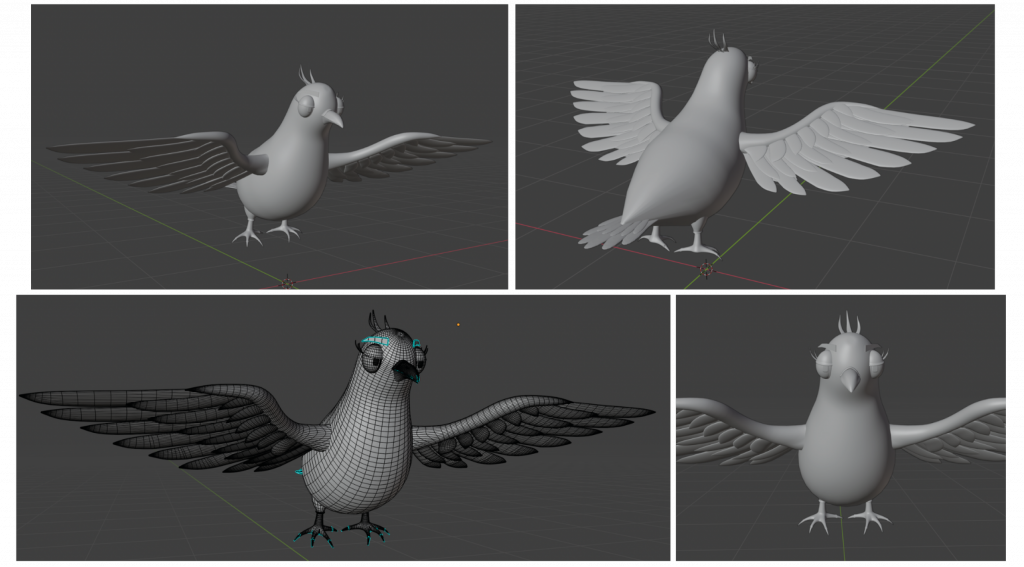
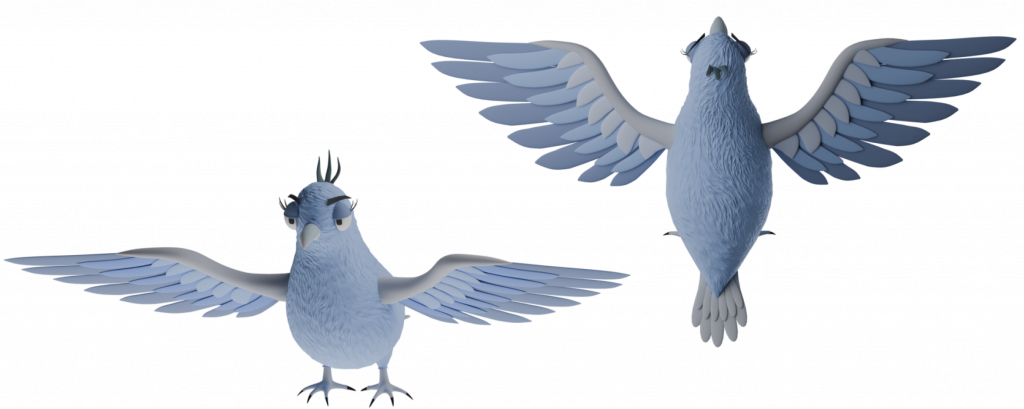
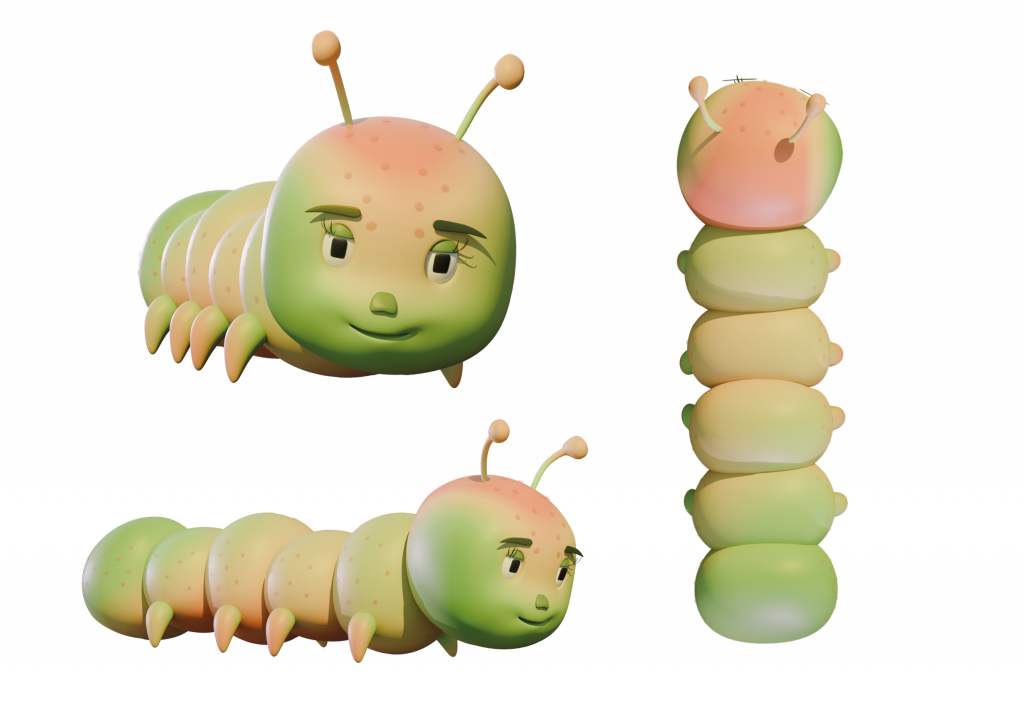
The next stage of the project involved modelling the characters. The two main protagonists of the animation are the bird and the caterpillar. As 3D modelling has not been my strongest skill, I decided to work entirely in Blender, a tool I was already familiar with from previous projects. This allowed me to focus more confidently on the creative and technical challenges ahead rather than the software itself. I also chose to work with simple, low-poly forms, both as a stylistic decision and as a practical one, as this approach made the rigging and animation process more manageable and accessible.
BIRD 3D MODEL
CATERPILLAR 3D MODEL

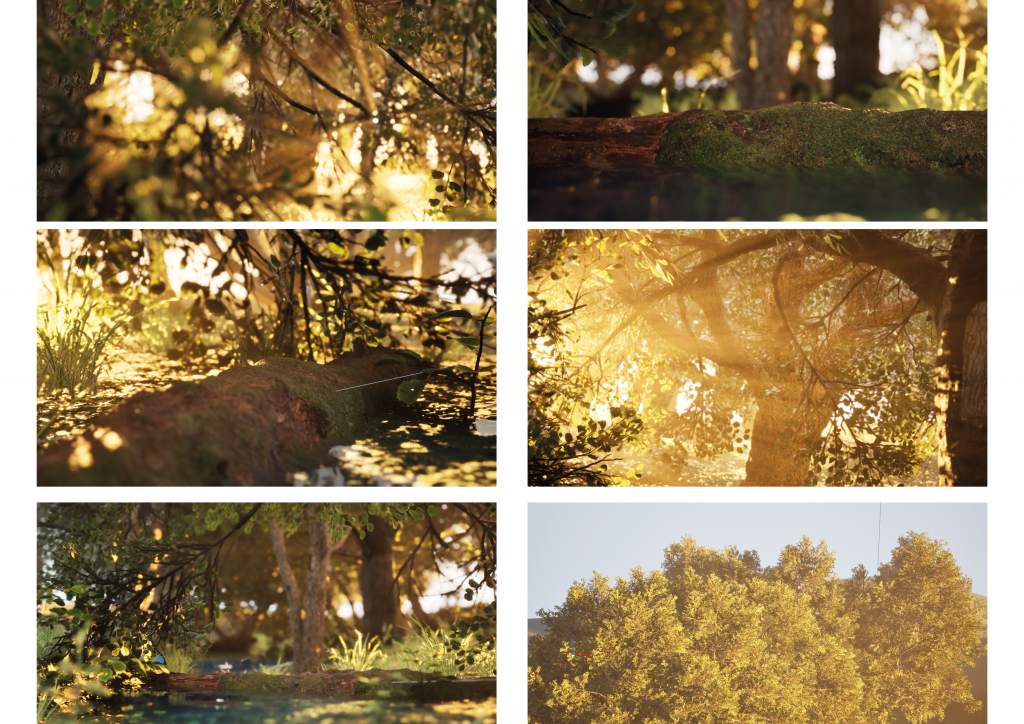
3. DESIGNING THE ENVIRONMENT IN UNREAL ENGINE 5
After modelling the protagonists of the animation, I moved to creating the environment using Unreal Engine 5. I chose to set the scenes in a forest and quickly realised that this required the design of two distinct landscapes: one intended for top-down shots and another for closer, more detailed views. This stage became one of my favourite parts of the project, as it marked a shift in my confidence when working in Unreal Engine. What initially felt technical and intimidating gradually became an enjoyable and intuitive part of my workflow, and I now find working in Unreal Engine genuinely pleasurable.
To build the environments, I used the Black Alder tree and foliage pack from Quixel Megascans, which allowed me to achieve a rich, natural setting.
TOP-VIEW SHOTS
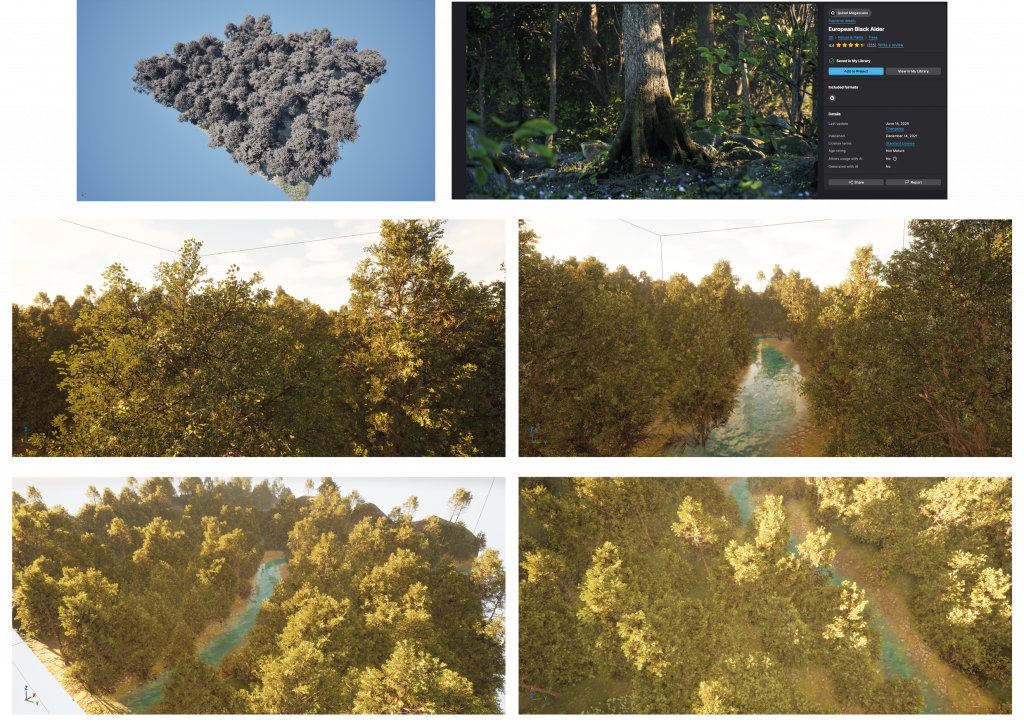
CLOSE-UP SHOTS
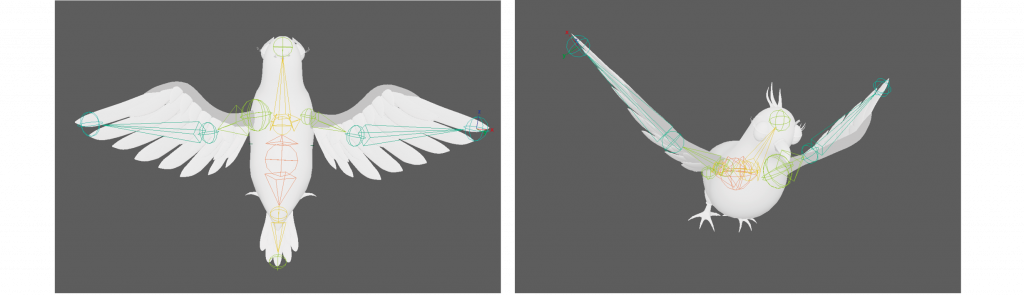
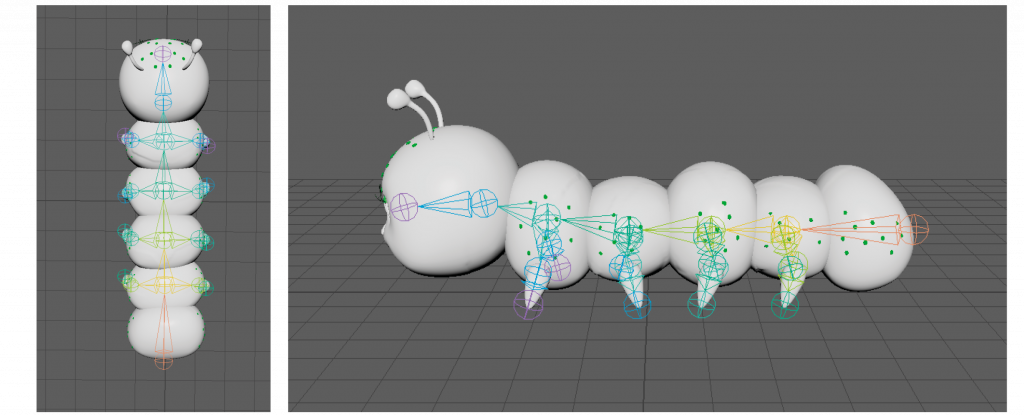
4. RIGGING AND ANIMATING IN MAYA
Undoubtedly, the most challenging stage of the process was rigging and animating the characters in Maya. I did not feel confident working with this software and had never attempted rigging independently before. Initially, this made the task feel daunting; however, after spending time familiarising myself with the available tools and workflows, the process became more approachable and ultimately more straightforward than I had anticipated.
I began by creating a simple rig for the bird, which enabled me to animate its flying motion. My main focus was achieving a sense of smoothness and natural movement. I paid particular attention to ensuring that the wing motion influenced the rest of the body, allowing secondary elements such as the belly and tail to respond organically, which helped give the animation a more cohesive and believable feel.
In the case of the caterpillar, I needed to create a rig that would allow me to move each section of its body, allowing it to fold and turn upwards, as well as joints for all the legs.
5. RENDERING
To further challenge myself and gain more practice in compositing with Nuke, I made a deliberate decision not to import the characters into Unreal Engine, but instead render them separately in Blender using the Cycles rendering engine.
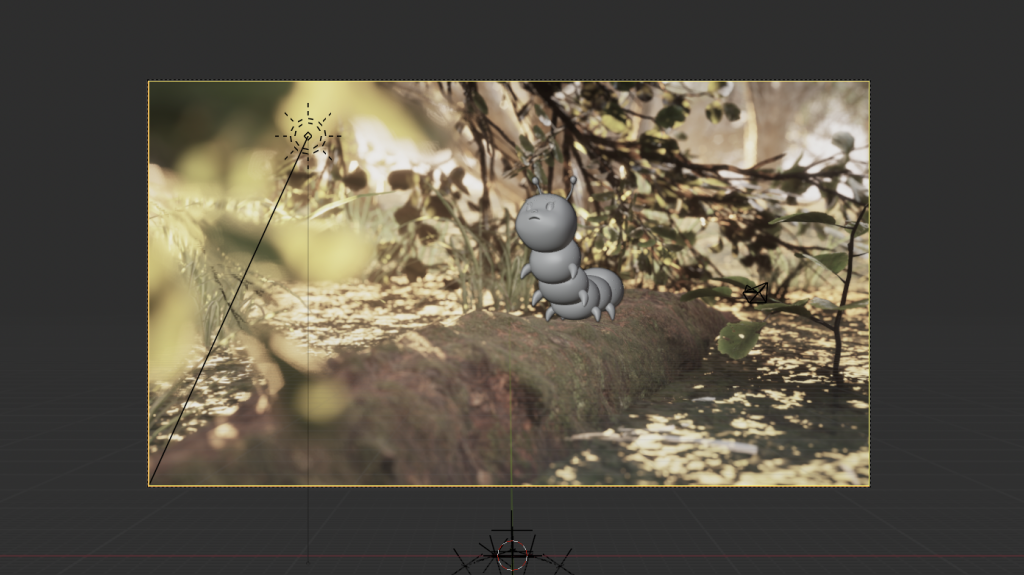
To ensure consistency in scale and movement, I exported selected elements of the forest environment and imported them into Maya. This allowed me to accurately position the characters and ensure that their movement aligned convincingly with the ground and surrounding elements. I then rendered the environment in Unreal Engine and used a single frame as a background image within Blender’s camera view, which helped me place the protagonists correctly within the final composition. Using the colours and lighting information from this background image as reference, I adjusted the character lighting accordingly before rendering them with an alpha channel for compositing.
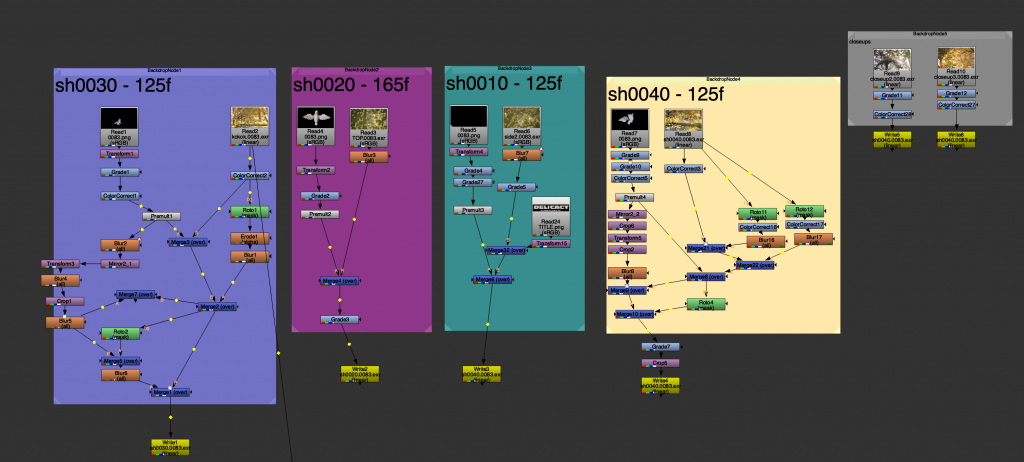
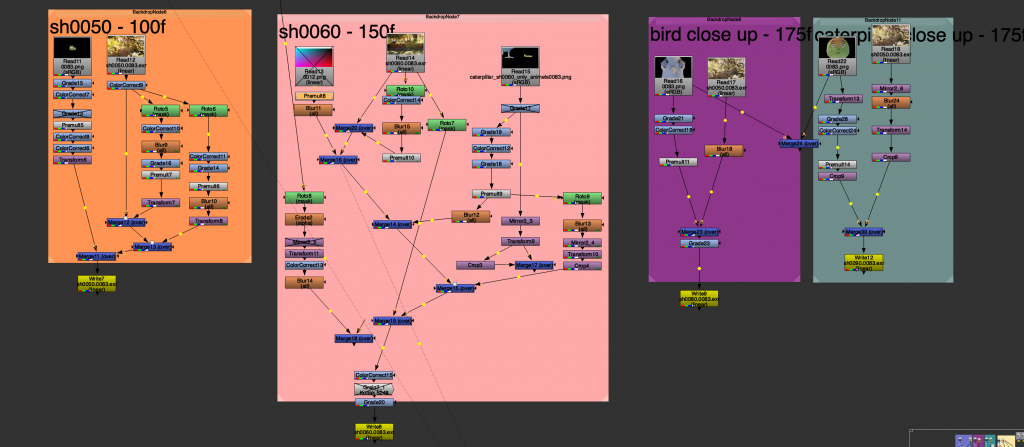
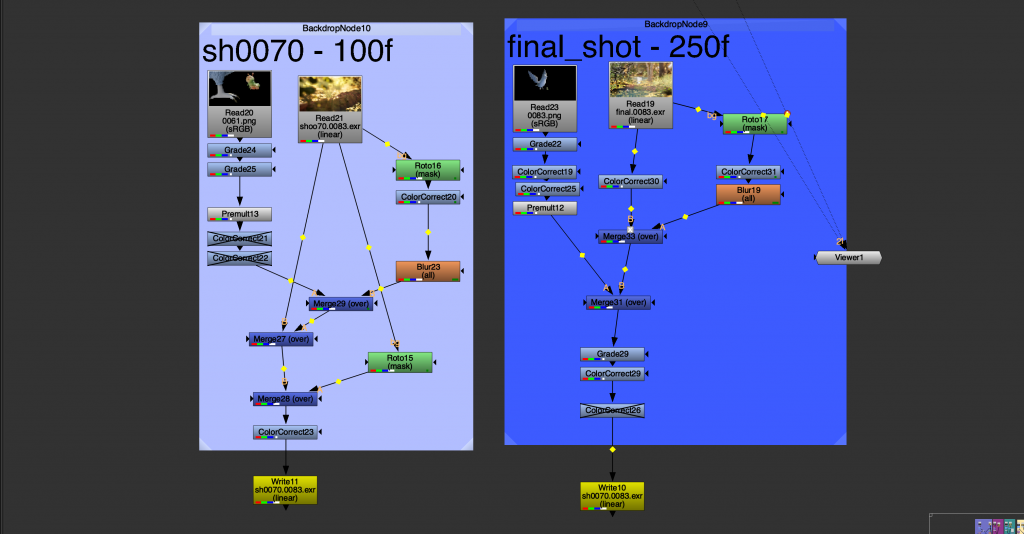
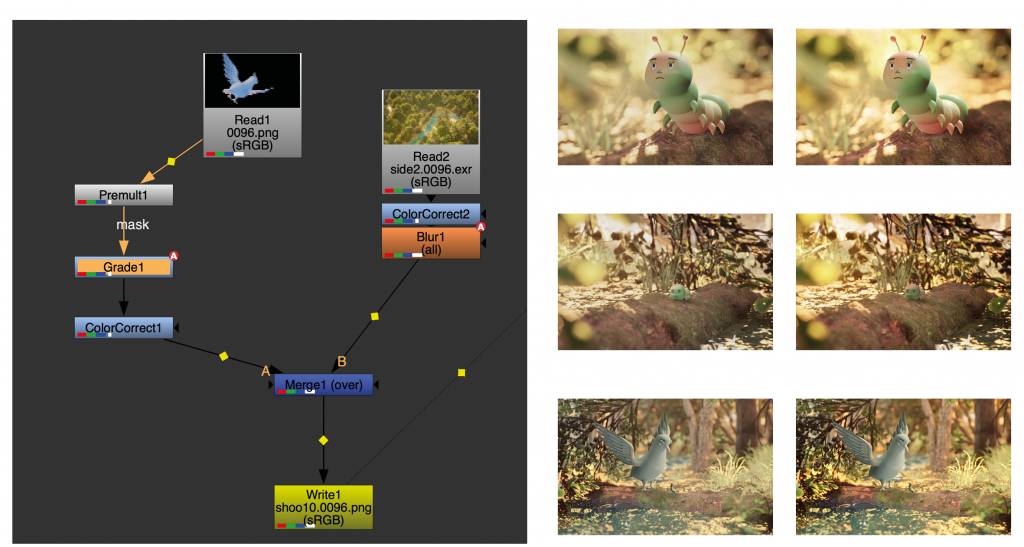
6. COMPOSITING IN NUKE
The final stage of the project involved bringing all the elements together in Nuke, which became my favourite part of the entire process. I learned the fundamentals of colour grading and experimented with compositing techniques such as integrating shadows and reflections in the water. This stage deepened my understanding of how compositing can shape the mood of an animation and transform renders to better reflect creative intent.
I composited all of the shots within a single Nuke setup, separating them using different coloured backdrops.
7. FINAL COLOUR GRADING
After compositing all the shots, I rendered them and assembled the sequence in DaVinci Resolve Studio. Once exported as a MOV file, I brought the video back into Nuke to apply the final colour grading.
8. MUSIC AND SOUND DESIGN
The final step was adding music and sound effects to the scene. I chose light, playful music that transitions into a more tense tone at the moment of the characters’ confrontation. As a second layer, I integrated wing movement sounds, carefully adjusting them to match the animation as closely as possible. I also added sound effects for the caterpillar moving along the fallen branch and for the bird drinking water. The third layer consisted of ambient background sounds, such as birds chirping and leaves moving in the wind, which helped establish the overall tone of the animation.

VFX FUNDAMENTALS FINAL TERM 1 PROJECT
VFX BREAKDOWN